

Medical Disclaimer: For informational purposes only. Not medical advice, diagnosis, or treatment. Consult a qualified healthcare provider before starting any new exercise programme, especially if you have persistent pain, swelling, locking, instability, trauma, or symptoms that change how you walk.
Published: July 2026 | Last Updated: July 2026 | Reviewed By: IBN EL KHATYB
Dynamic stat: Research database: 16 peer-reviewed sources on squat bracing mechanics and intra-abdominal pressure
What This Guide Covers
- The Problem, Hook, and Field Test
- Science, Anatomy, and What Most Articles Get Wrong
- Protocol, Decision Engine, and Progression
- Recovery, Safety, Saveable Asset, FAQ, and CTA

Squat Bracing for Beginners: Stay Tight Without Overthinking
Squat bracing for beginners means creating simple 360-degree torso tension before each rep so your trunk stays stable while your hips and knees do the movement. You do not need a perfect “deep core” script or a complicated breathing ritual. You need a repeatable pre-rep stiffness strategy that matches squat demands.
If you are learning beginner barbell technique fixes that improve form, bracing is the first skill that separates a shaky rep from a controlled one. The full system covers 21 cues that build on this foundation.
At 6:15 AM on a Tuesday in March, I was three reps into a goblet squat set with a 16 kg kettlebell when my ribs flared, my breath turned shallow, and the weight drifted forward. My torso collapsed. I had been told to “keep my core tight,” but tight was just a word with no shape or sequence. That morning taught me that vague advice burns neural bandwidth without producing output. Your nervous system does not negotiate. It needs a clear input to produce a clear output.
Here is exactly what this guide covers: a 5-minute field test, the biomechanics of bracing, a step-by-step protocol with a breathing decision engine, and a saveable checklist with red flags.
The Problem, Hook, and Field Test
Most beginners fail at squat bracing because they chase complex breathing scripts instead of learning simple 360-degree torso stiffness that keeps the ribs stacked over the pelvis.
Why Beginner Squat Bracing Feels Confusing
Walk into any gym and you will hear three conflicting cues within five minutes. “Brace your core.” “Breathe into your belly.” “Draw your navel in.” For a beginner, this is system overload. The brain receives contradictory inputs and defaults to panic breathing and a floppy midsection.
Research suggests that abdominal bracing produces dramatically higher intra-abdominal pressure than hollowing: 116.4±15.0 mmHg versus 9.9±4.5 mmHg Tayashiki et al., 2015. That is an order of magnitude. Yet most articles still mash bracing, hollowing, and “core engagement” into the same vague paragraph.
From a systems perspective, the problem is input ambiguity. When the nervous system receives a fuzzy command like “stay tight,” it cannot recruit the right muscles in the right sequence.
| What Beginners Think | What It Actually Is | What to Feel |
|---|---|---|
| Sucking in your stomach | Pressurizing the entire torso | Pressure at sides, back, and front |
| Holding breath as long as possible | Brief, manageable stiffness | Controlled tension, not starvation |
| A single muscle “turning on” | Co-contraction of the entire wall | A cylinder, not a point |
The Wolfgymcore Neural-Mechanical Systems Method™ reframes bracing as a “stay stacked, then stay stiff” skill. Stack ribs over pelvis first. Then create stiffness. Then move.
The Wolfgymcore Neural-Mechanical Systems Method™
Input → Neural Load → Tissue Stress → Recovery Signal → Adaptation → Output
Bracing is the Input gate. If the input is noisy, every downstream stage suffers.
WolfGymCore Squat Bracing Field Test
This is a research-derived self-check, not a diagnosis. Abdominal activation strategies reduced trunk sway by 25–36% versus natural standing during perturbation tasks Tayashiki et al., 2015. Use this test to benchmark your control.
- Set up. Stand squat-width. Hands on lower ribs and pelvis.
- Stack. Align ribs over pelvis without exaggerated arch or tuck.
- Brace. Small breath, then stiffen trunk as if for a light punch. Hold 5 seconds.
- Squat. 5 slow bodyweight squats maintaining stiffness.
- Score. Use the table below.
Stop rule: Stop immediately if you feel pain, dizziness, or sharp discomfort.
| Checkpoint | Pass | Regress | Progress |
|---|---|---|---|
| Setup: ribs over pelvis | Maintains alignment | Ribs flare or pelvis tucks | Automatic and stable |
| Torso control through 5 reps | No collapse | Mid-rep loosening | Stiffness holds at slow tempo |
| Breath control | No gasping | Dizziness or head pressure | Can modulate without losing brace |
| Rep consistency | All 5 reps similar | First 2 good, last 3 collapse | Ready to add load |
Squat Bracing Diagnostic Matrix
| What You Notice | Likely Training Signal | First Adjustment | Progress Rule |
|---|---|---|---|
| Torso collapses mid-rep | Brace timing issue | Reset each rep; smaller breath | Hold current load |
| Ribs flare on descent | Canister not stacked | Cue ribs down; brace before moving | Regress to bodyweight |
| Dizzy after set | Breath-holding too aggressive | Switch to controlled nasal breathing | Hold current load |
| Lower back rounds | Insufficient 360-degree stiffness | Brace all around, not just front | Regress to goblet squat |
| Reps stable and controlled | Good input-output match | Add 2.5 to 5 kg next session | Progress one variable only |
Good bracing should look stable and feel controlled, not dramatic or breath-starved. Signal over noise. Always.
Squat bracing for beginners is not a breathing hack; it is a repeatable stiffness strategy that keeps the torso canister stacked while the hips and knees drive the motion.
But before you run the test in your next session, you need to know what bracing actually changes inside your body. The mechanism is simpler than most coaches make it sound.
Science, Anatomy, and What Most Articles Get Wrong
Bracing works by increasing intra-abdominal pressure and trunk co-contraction, which can improve stiffness and reduce unwanted spinal motion more than vague “tight core” cues.
What Bracing Actually Does in the Squat
Your torso is a canister. The top is the ribcage. The bottom is the pelvis. The walls are the abdominal muscles, obliques, and lower back. When you brace correctly, you pressurize that canister from all sides. Biomechanics research indicates that spinal stiffness increased 8–31% when intra-abdominal pressure increased Cholewicki et al., 1999.
The cause-and-effect chain is straightforward. Preemptive abdominal contraction raises intra-abdominal pressure and co-contracts trunk muscles. That stiffness resists unwanted spinal motion while the hips and knees drive the squat. Poor bracing contributes to torso collapse or compensations that raise joint stress.
Here is the three-step chain:
- Brace. Create 360-degree tension around the trunk.
- Pressurize. Raised IAP and co-contraction increase stiffness.
- Move. Hips and knees drive the squat while the spine resists motion.
The practical output is not “maximal pressure at all costs.” It is repeatable tension with manageable breathing. More is not better. Better is better.
Bracing Versus Hollowing Versus Belt Use
Beginners hear three strategies. Most articles mash them together. They are not interchangeable.
Abdominal bracing improved modeled stability by 32%, whereas the transversus abdominis alone contributed only 0.14% Cholewicki et al., 1999. Hollowing works in low-load rehab contexts, but bracing matches loaded squats and is easier to teach. For beginners, bracing is the default. Belts are optional.
| Strategy | Best For | Beginner Verdict |
|---|---|---|
| Simple bracing | Most beginners | Best default |
| Drawing-in (hollowing) | Low-load rehab | Teaching tool, not main cue |
| Belt only | Extra stiffness support | Optional, not first-line |
| Brace + belt | Heavy loads, solid technique | Later progression |
What Most Articles Get Wrong About Staying Tight
Hot take: The fitness industry’s obsession with “deep core” activation before basic torso stiffness is like tuning a race car’s suspension before the engine runs. Beginners do not need transversus abdominis isolation. They need a canister that does not fold under a kettlebell.
Generic advice fails because it ignores load, task, and simplicity. Frankly, most fitness content treats bracing like a mindfulness exercise instead of a mechanical skill.
Wait — actually, that framing is misleading. When I first started coaching, I told people to “draw your belly button in” because that was what I had read in rehab manuals. But hollowing produces minimal intra-abdominal pressure and does not match loaded squat demands. Bracing does. The body adapts to systems, not chaos, and the system of bracing is built for load.
| Generic Advice | Why It Fails | Better Answer |
|---|---|---|
| “Just keep your core tight” | Too vague; no sensory reference | Small inhale, brace around trunk, ribs stacked |
| “Always exhale on the way up” | Ignores pressure demands | Controlled exhale light; brief hold heavy |
| “Use a belt to protect your back” | Belt is not bracing skill | Belt adds stiffness; active bracing still matters |
| “Draw your belly button in” | Low-load only | Brace outward for loaded squats |
| “Unstable surfaces build core better” | Lowers force without EMG benefit | Stable free-weight squats for tightness |
Belt use alone did not significantly alter muscle activation during loaded squats Lynch et al., 2025. The belt is not a substitute for learning to brace.
The body adapts to systems, not chaos, and a simple pre-rep brace sequence delivers more signal than ten conflicting core cues ever will.
That Tuesday morning at 6:15 AM, my torso collapsed because I had no canister. Once you see the mechanism, the cues stop being abstract. They become mechanical.
Now that you know what bracing does and what to ignore, the question becomes how to apply it rep by rep. The protocol is where reading turns into better squats the same day.
Protocol, Decision Engine, and Progression
The best beginner squat bracing protocol is small breath, brace around the torso, squat under control, and reset between reps if tightness disappears.
The Beginner Squat Bracing Protocol
Research suggests this cue sequence for beginners: “gently inhale, then exhale, now stiffen your trunk as though you will be hit in the belly” Lynch et al., 2025. Here is the full system.
3 Beginner Cues:
- Stack. Set stance. Align ribs over pelvis. No exaggerated arch or tuck.
- Breathe. Small, quiet breath through the nose. Do not overfill.
- Brace. Stiffen trunk circumferentially, as if for a light punch. Hold it.
3 Rep Checks:
- Torso shape. Ribcage stays stacked over pelvis during descent?
- Pressure. Tension at sides and lower back, not just front?
- Speed. Descending under control, not dropping?
3 Reset Signals:
- Torso shape lost. Ribs flare or lower back rounds.
- Panic-breathe. Breath becomes shallow or you feel dizzy.
- Inconsistent reps. Rep 1 stable; rep 4 is a mess.
If any reset signal appears, stop the set. Reset breath and brace. Then continue. The body adapts to systems, not chaos.
| Exercise | Sets x Reps | Frequency | Rest | Cue Focus |
|---|---|---|---|---|
| Bodyweight squat | 2-3 x 8 | 2-3x/week | 90 sec | Stack and brace timing |
| Goblet squat (light) | 3 x 6 | 2-3x/week | 2 min | 360-degree tension under load |
| Empty barbell squat | 3 x 5 | 2-3x/week | 2-3 min | Pre-rep brace before un-racking |
| Loaded barbell squat | 3-4 x 3-5 | 2-3x/week | 3 min | Breathing by load |
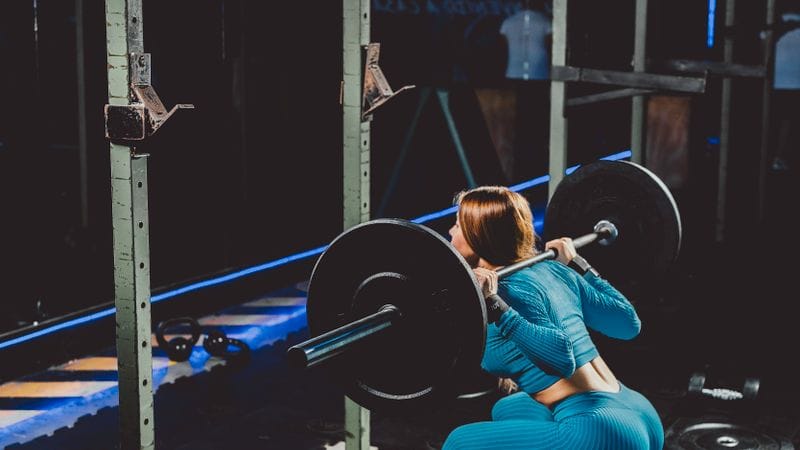
If you are new to loaded squats, start with the beginner weightlifting program to build the base before adding barbell variations.
WolfGymCore Decision Engine for Breathing and Load
Beginners need a decision framework, not one universal cue. Breath-holding raised systolic blood pressure by 16-23% and perceived exertion by 14-19% versus controlled breathing Hummelmann et al., 2026.
| Training Signal | Likely Cause | Breathing Strategy | Load Action |
|---|---|---|---|
| Rep speed good, torso stable | Brace and breath matched | Normal controlled breathing | Progress — add small load |
| Torso collapses mid-rep | Brace insufficient for load | Reset each rep with small breath + brace | Hold |
| Dizzy or head pressure | Breath-holding too aggressive | Controlled nasal breathing | Hold — reduce if needed |
| Cannot stay tight through set | Fatigue or skill limit | Reset between every rep | Regress |
| Chest pain, visual symptoms, worsening pain | Medical red flag | Stop breath-holding immediately | Stop — seek assessment |
Lighter sets suit controlled breathing. Harder sets may use a brief natural hold. Sustained Valsalva is not the first teaching step.
Progression, Regression, and Programming Mistakes
Heavy squats can exceed 200 mmHg intra-abdominal pressure. If you cannot stay tight on easy reps, more load is not the fix.
WolfGymCore Tolerance Score = Pain During Set (0-3) + Next-Day Response (0-3) + Movement Control (0-3). Total 0-9.
- 0-2: Regress
- 3-5: Hold
- 6-7: Progress one variable
- 8-9: Progress cautiously; film and review
Progress only if these 4 things are true:
- Ribs over pelvis without reminder.
- Brace before every rep.
- Breathing produces no dizziness or head pressure.
- Last rep looks like first rep.
More is not better. Better is better, and for beginner squat bracing, better means 360-degree tension that you can repeat every single rep.
If I had known this protocol back then, that 16 kg goblet squat at 6:15 AM would have looked different. Small breath. Brace around the trunk. Ribs down. Reset if lost. Five clean reps instead of three collapsing ones.
Once you have the protocol and decision engine, the last piece is knowing when to push, when to pause, and when to stop. That is where recovery, red flags, and the saveable checklist come in.
Download the WolfGymCore Beginner Squat Bracing Checklist
A one-page printable card with the 3-cue protocol, decision engine, and red-flag checklist.
Enter your email below. No spam. Unsubscribe anytime.
Recovery, Safety, Saveable Asset, FAQ, and CTA
Recovery supports better squat practice indirectly, while red flags like worsening pain, dizziness, or repeated loss of torso control mean stop self-experimenting and seek help.
Recovery, Red Flags, and Safe Boundaries
There is no direct nutrition evidence for “better bracing.” Good sleep and manageable fatigue create conditions for motor learning. They do not replace the skill.
Longer breath-holding increases intraocular pressure progressively, and high-risk individuals should avoid breath-holding strategies. This matters if you have glaucoma, uncontrolled blood pressure, or a history of syncope.
| Red Flag | Category | Action |
|---|---|---|
| Worsening pain during or after squats | Training red flag | Stop; regress to bodyweight or rest |
| Dizziness, visual changes, headache | Medical red flag | Stop breath-holding; seek assessment if recurrent |
| Repeated loss of spinal control | Training red flag | Reduce load; film and review |
| Chest pressure or palpitations | Medical red flag | Stop immediately; consult provider |
| Pelvic floor symptoms | Medical red flag | Stop heavy bracing; seek pelvic floor assessment |
When to See a Healthcare Professional
Stop self-testing and get assessed if pain follows trauma, causes swelling, locking, giving way, warmth, night pain, limping, or keeps worsening beyond 1-2 weeks. If bracing consistently aggravates symptoms, consult a qualified healthcare provider before continuing.
The Saveable Beginner Bracing Checklist
Bracing reduced intersegmental lumbar motion by 45-94% at most lumbar levels during sudden loading. That is why “stay still through the trunk” belongs on your checklist.
WolfGymCore Beginner Squat Bracing Checklist
Before the Rep
- Stance set — feet shoulder-width or slightly wider
- Ribs stacked over pelvis — no flare, no tuck
- Small breath in — quiet, through the nose
- Brace 360 degrees — stiffen as if for a light punch
During the Rep
- Descend under control — 2-3 seconds down
- Torso shape holds — ribs down, back neutral
- Pressure felt at sides and lower back
After the Rep
- Reset breath if tightness was lost
- Re-brace before next rep
- Stop set if 2 or more reset signals appear
FAQ and Final Action Plan
Quick Answers About Squat Bracing for Beginners
How to brace during squats beginner? Set stance, align ribs over pelvis, small breath, stiffen trunk 360 degrees as if for a light punch. Hold through the descent.
Should beginners hold their breath while squatting? Not by default. Controlled breathing at lighter loads. Brief natural hold may appear at harder efforts. Forced Valsalva is not the starting point.
What are the most common squat bracing mistakes beginners make? Sucking in, overholding breath, bracing only front abs, and adding load faster than control allows.
How do I stay tight in the squat without overthinking? Use the three-cue protocol — stack, breathe, brace — and reset between reps if tightness disappears.
How to brace during squats beginner?
Start with stance. Stack ribs over pelvis. Small breath. Stiffen trunk 360 degrees. Descend under control. Reset between reps if you lose tension.
Should beginners hold their breath while squatting?
VM-like breath holding becomes hard to avoid above about 80% effort. At beginner loads, controlled breathing is safer and feels easier. A brief natural hold at a hard rep is normal. Sustained Valsalva is not the starting point.
What are the most common squat bracing mistakes beginners make?
The classic errors: drawing the belly button in instead of bracing outward; holding breath until dizziness; wearing a belt before learning intrinsic bracing; adding load while torso control is inconsistent. Each is a signal-to-noise ratio problem.
How do I stay tight in the squat without overthinking?
Use the three-cue protocol and reset rule. If you need more than three cues, the load is too high or the skill is too new. Film one set from the side. If torso shape changes between rep 1 and rep 5, reset each rep until it does not.
Final Action Plan
Run the field test today. Pick one cue and focus on it for your entire session. Film one set. Review for torso collapse. Use the beginner protocol for 2-3 weeks. Progress only when the recovery and nutrition base supports consistent practice and your WolfGymCore Tolerance Score is 6 or higher.
Start Building Your Bracing System Today
The Tuesday morning collapse was not a failure. It was data. It showed me that my system needed a better input. The checklist at the end of this guide is that input. Squat bracing for beginners is not about perfection. It is about creating a repeatable stiffness signal that your nervous system can trust.
The Wolfgymcore Neural-Mechanical Systems Method™ teaches that bracing is the Input gate. When the input is clean — stack, breathe, brace — the output takes care of itself. Your hips and knees move. Your trunk stays still. The force travels where it should.
Start today: Run the field test, pick your cue, film 1 set, and save the checklist. Read the foundational beginner barbell technique fixes that improve form or download the free checklist below.
Keep Reading
Weightlifting Program for Beginners: The 12-Week System
A complete 12-week progression that builds squat, press, and pull strength from the ground up.
The 2026 Protein Powder for Muscle Gain Protocol
How to match protein intake to your training frequency so recovery supports every bracing session.
How to Build Strength at Home: The Systems Protocol
Apply the same input-output logic to home training with minimal equipment.
About IBN EL KHATYB
Founder of wolfgymcore.com. Writes evidence-informed fitness guides using scientific sources, beginner-friendly training logic, and practical strength programming principles. Also builds AI automation workflows and server systems, then applies the same input-output logic to training content.
Credentials: Performance Systems Specialist | Experience: 2+ years fitness content & biomechanics analysis | Focus: Progressive overload, injury prevention, and systems-based training.
More about the author | Follow on X
Medical Disclaimer: This content is educational and is not a substitute for medical advice, diagnosis, or treatment.
Update Log
- July 2026 — v1.0: Initial publication.
References
- Tayashiki et al., 2015 — Abdominal bracing versus hollowing intra-abdominal pressure comparison.
- Cholewicki et al., 1999 — Lumbar spine stability via abdominal belt and intra-abdominal pressure.
- Lynch et al., 2025 — Muscle activation response to abdominal bracing and belt use during loaded squat.
- Hummelmann et al., 2026 — Breathing technique-dependent cardiopulmonary responses during squats.
Squat Bracing Evidence Ladder
| Claim | Evidence Strength | Source Type |
|---|---|---|
| Abdominal bracing increases abdominal activation during loaded squats | Strong (8/10) | Controlled human biomechanics study |
| Increased IAP improves lumbar stiffness and stability | Strong (8/10) | Human biomechanics + theoretical modeling |
| Breath holding raises blood pressure and effort during squats | Moderate (7/10) | Randomized crossover human study |
| Belts increase stiffness but do not replace active bracing | Moderate (7/10) | Human biomechanics + finite element modeling |
| Direct evidence for beginner-specific bracing protocols | Limited (4/10) | Indirect evidence + practical coaching logic |