

Medical Disclaimer: For informational purposes only. Not medical advice, diagnosis, or treatment. Consult a qualified healthcare provider before starting any new exercise programme, especially if you have persistent pain, swelling, locking, instability, trauma, or symptoms that change how you walk.
Published: July 2026 | Last Updated: July 2026 | Reviewed By: IBN EL KHATYB
Dynamic stat: Lumbar spine accounts for up to 53% of all rowing-related injuries across studies.
Barbell Row Form For Beginners

Barbell Row Form for Beginners: Stop Using Your Lower Back
Your lower back should not be the first muscle to fatigue during barbell rows. If it is, your hinge is failing before your lats ever get a chance to work. Drop the load by at least 20% today, film yourself from the side, and check whether your torso angle drifts upward across the set. If sharp pain or radiating symptoms accompany the tightness, stop rowing immediately and get assessed. If it is just muscular fatigue in the wrong place, the fix is mechanical—and it is entirely trainable.
This article pulls from the WolfGymCore barbell technique pillar and gives you the exact self-check system, progression ladder, and decision rules that turn the barbell row from a lower-back stressor into a lat-building staple. No vague cues. No “just squeeze your shoulder blades.” Just a system you can run this week.
It was a Tuesday at 6:15 AM. The gym was empty except for one guy in the corner, bent over a barbell, his torso rising two degrees every rep, his lower back slowly tightening into a knot he would feel at his desk all day. He thought he was building a back.
He was actually building a compensation pattern. That guy was me, six months into lifting, convinced I was doing barbell rows correctly because I had watched the form videos. What I had not done was film myself from the side. When I finally did, I watched my torso rise like a drawbridge from rep 3 onward.
My hips were doing the work. My lats were barely involved. The tension I felt in my lower back was not activation—it was overload.
Here is exactly what this guide covers: why your lower back hijacks every row, the hinge-endurance bottleneck that causes it, a 6-week progression from inverted rows to loaded barbell rows, and the red-flag system that tells you when to push and when to switch variations.
Table of Contents
- Why Your Lower Back Hijacks Every Barbell Row
- The Science Behind the Hinge-Endurance Bottleneck
- The WolfGymCore Beginner Row Protocol
- Red Flags, Recovery Rules, and Your Saveable Row Checklist
Why Your Lower Back Hijacks Every Barbell Row Form For Beginners(And How to Know If It’s Happening to You)
Your lower back takes over barbell rows when your hip hinge fails to stay stable, forcing the erector spinae to shift from a stabilizer role into a mover role. The fix is reducing load until your torso angle stays fixed across all reps—not cueing your lats harder while the hinge collapses.
The Gym Moment That Exposes Every Beginner’s Row
You load a barbell with what feels like a reasonable weight. You hinge forward, brace, and pull the first rep. It feels fine. By rep 4, something shifts. Your torso has crept up a few degrees. By rep 7, you are practically standing upright for the last inch of the pull, using hip extension to drive the bar to your chest. The set ends. Your lower back feels pumped—tighter than after deadlifts. Your lats? Nothing. Maybe a faint awareness that they exist. That is the moment. That is the hinge failing in real time.
The problem is not your lat strength. The problem is that your lower back is doing two jobs—stabilizing your spine isometrically while also contributing to the movement dynamically—because your hinge endurance ran out before your set did. Once the erectors start moving, they dominate the force equation. Your lats go quiet because the movement pattern shifts from a row to a partial deadlift-hip-extension hybrid.
Why Your Lower Back Takes Over (And Your Lats Go Silent)
From a systems perspective, your body follows a simple hierarchy: survival over performance, every time. When your hip hinge fatigues, your nervous system does not negotiate. It recruits whatever motor pattern can complete the rep with the least perceived threat. Rising out of the hinge shortens the lever arm on the spine, reduces the compressive moment, and lets the glutes and hamstrings contribute force. The lats, which require a stable anchor point to pull from, lose their mechanical advantage the moment the torso angle changes. The rep gets completed, but the target muscles stop being targeted.
Three things happen in sequence: hinge angle drifts upward → erector spinae contract dynamically instead of isometrically → bar path shifts away from the body, turning the row into a hybrid shrug-deadlift. You finish the set feeling like you worked hard. And you did. Just not the muscles you showed up to train.
The WolfGymCore 4-Point Promise
By the end of this guide, you will know: (1) the exact mechanical chain that causes lower-back takeover during rows, (2) how to self-assess whether your hinge endurance matches your current load, (3) a 6-week progression that builds rowing capacity without lumbar compensation, and (4) a decision system that tells you when to regress, hold, progress, or stop. No vague advice. No “just keep your back straight.” Actionable, checkable, filmable.
The Wolfgymcore Neural-Mechanical Systems Method™
Every compound lift follows a chain: Input → Neural Load → Tissue Stress → Recovery Signal → Adaptation → Output. The barbell row fails when neural load—hinge endurance—maxes out before the target muscles fatigue. The system breaks at step two, and compensation fills the gap.
The Hinge-Stability Field Test: Find Your Real Limit
WolfGymCore Barbell Row Hinge-Stability Field Test — Use this 5-minute self-check before adding weight to your rows. This is not a diagnostic test. It is a training self-check. Stop immediately if you experience sharp pain, radiating symptoms, or dizziness.
Equipment: Barbell with light load (empty bar or 20 kg), rack, phone/camera or training partner.
Steps:
- Set up for a standard barbell row with your chosen starting weight. Film or have a partner observe from the side.
- Perform a 10-rep set at a controlled tempo (1 second up, 2 seconds down, 1-second pause at top).
- Before rep 1, note your torso angle relative to the floor (estimate: 30°, 45°, or 60°).
- Before rep 10, have your partner or video confirm whether your torso angle changed by more than ~10 degrees.
- During the set, assess: Do your lats fatigue before your lower back? Does your brace hold for all 10 reps?
Scoring (rate each 0–3): Torso consistency + Brace quality + Lat-before-back fatigue. Add 1 bonus point if you can perform the set without needing to reset your feet or grip. Total: 0–10.
| Score | Interpretation | Action |
|---|---|---|
| 0–2 | Hinge endurance and bracing insufficient for loaded rows | Switch to inverted rows and Romanian deadlifts for 3–4 weeks. Re-test. |
| 3–5 | Marginal. Load exceeds current hinge capacity | Reduce load by 10%. Add 2 sets of bodyweight hip hinges or band pull-throughs. |
| 6–8 | Good. Hinge stability is adequate | Proceed with light to moderate loaded rows. |
| 9–10 | Excellent. Hinge is not your limiting factor | Focus on progressive overload with form monitoring. |
Evidence basis: Fenwick et al. (2009) established lumbar spine load comparisons across rowing variations, and Edelburg (2017) confirmed lat and mid-back recruitment patterns when form is maintained. This test translates those findings into a practical self-check.
Stop and seek help if: Sharp pain occurs during the test, or lower-back discomfort persists for more than 24 hours afterward.
The pain is not random. It follows a specific mechanical chain—and once you see it, you cannot unsee it.
The Science Behind the Hinge-Endurance Bottleneck
The hinge-endurance bottleneck means your spinal stabilizers fatigue before your lats, shifting the row from a back exercise into a hip-extension movement. Research confirms the standing bent-over row produces the highest lumbar spine load among common rowing variations, making load selection the primary safety variable for beginners.
Anatomy of a Broken Row: The Cause-Effect Chain
Here is the four-step chain that turns a barbell row into a lower-back stressor.
Step 1: The lifter sets up with a 45-degree torso angle and begins pulling.
Step 2: Around rep 4 or 5, the erector spinae—which are supposed to contract isometrically to hold the spine in neutral—begin to fatigue.
Step 3: To compensate, the lifter unconsciously rises out of the hinge, shortening the lever arm on the lumbar spine and recruiting the hip extensors to help finish each rep.
Step 4: The bar drifts forward, the lats lose their line of pull, and the movement becomes a partial deadlift with a shrug. The lifter completes the set. The lats got maybe three effective reps. The lower back got ten.
The drawbridge effect I filmed that Tuesday morning has a clear biomechanical name: hip extension compensation. When the hinge fails, the body trades spinal stability for hip extension—every single time.
What the EMG and Biomechanics Data Actually Reveals
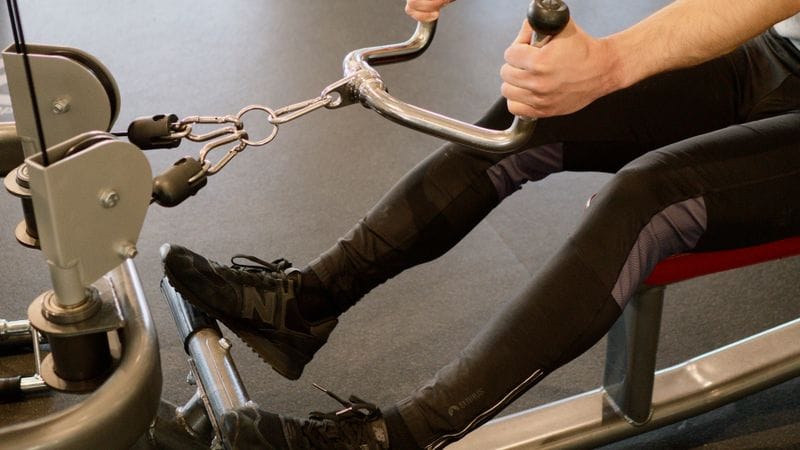
The numbers tell a clear story. Fenwick et al. (2009) compared trunk muscle activation and lumbar spine motion across three rowing variations and found the standing bent-over row produces the largest lumbar spine load—significantly higher than inverted rows or cable rows. That is not an argument against barbell rows. It is an argument for earning the right to load them.
When form is maintained, the exercise justifies its place. Edelburg’s 2017 EMG analysis of 19 subjects found barbell rows activate the latissimus dorsi at approximately 91% of maximum voluntary contraction—second only to pull-ups and chin-ups among eight common back exercises. That is elite lat recruitment. But the keyword is when form is maintained. The moment the hinge fails, that activation number becomes irrelevant because the movement is no longer a row.
On the injury side, the data is sobering. A 2020 review published in the Indian Journal of Orthopaedics reported that lumbar spine injuries account for up to 53% of all rowing-related injuries, with L4/L5 and L5/S1 as the most commonly affected levels. Spondylolysis prevalence in adult rowers sits at 17% compared to 11.5% in the general population. The primary mechanism? Lumbar flexion under compressive loading—exactly what happens when a beginner’s hinge collapses under a barbell.
Schäfer et al. (2023) modeled spinal compression forces during heavy lifting and found they significantly exceed occupational safety guideline recommendations. Load selection is not just about lifting more weight—it is about keeping spinal compression within a range your tissues can adapt to.
What Most Articles Get Wrong (And What to Do Instead)
| Common Advice | Why It Is Incomplete | Better Answer |
|---|---|---|
| “Keep your back straight.” | Vague; does not explain how to set the back or what straight feels like under load. | Squeeze your chest up, brace 360 degrees, and maintain the same torso angle from rep 1 to the final rep. Film yourself from the side. |
| “Pull the bar to your stomach.” | Touch point varies by anatomy and torso angle; can cause knee collision or excessive hip flexion. | Pull toward your lower chest or upper abs. The exact spot depends on your setup. Elbow path matters more than touch point. |
| “Use a weight you can handle.” | Meaningless. Beginners “handle” weight by compensating. | Use a weight that keeps your torso angle fixed across all reps. If rep 1 is 45° and rep 8 is 60°, the weight is too heavy. |
| “Barbell rows are a back exercise.” | Misleading. Erectors stabilize isometrically; they should not be the fatigued muscle. | Rows train your lats and mid-back while your lower back stabilizes. If your lower back burns before your lats, adjust load or variation. |
| “Just squeeze your shoulder blades.” | Retraction is the finish, not the foundation. Without hinge and brace, it is compensation. | Establish the hinge, brace the trunk, then drive elbows back and finish by retracting shoulder blades without shrugging. |
| “Do 3 sets of 10.” | Ignores the hinge-endurance bottleneck. High reps cause form breakdown. | Beginners: 3×8 with 3 RIR. Progress reps first, then load. If hinge fails before back fatigue, reduce reps or switch to supported rows. |
My honest take: Most barbell row content is written as if the reader is a coach who already knows what good form feels like. Beginners do not. They need a self-check system, not another cue list. The gap in the market is not more form descriptions—it is decision tools that tell the reader what to do when their form breaks down.
The Evidence Ladder: Strong, Moderate, Limited, and Practical-Only
| Claim | Evidence Level | Confidence | Best Source |
|---|---|---|---|
| Standing bent-over row produces the highest lumbar spine load among common rowing variations. | Strong | High | Fenwick et al., J Strength Cond Res, 2009 |
| Inverted rows produce the lowest spinal load while maintaining high lat activation. | Strong | High | Fenwick et al., J Strength Cond Res, 2009 |
| Bent-over rows activate lats at ~91% MVC (second only to pull-ups). | Moderate | Moderate-High | Edelburg, MS Thesis, 2017 |
| Heavy lifting exceeds occupational spinal compression guidelines. | Strong | High | Schäfer et al., Eur Spine J, 2023 |
| A 45-degree torso angle is optimal for beginners. | Practical only | Low-Moderate | Coaching consensus; no direct comparative study |
| Double overhand grip is safest for beginners. | Practical only | Low-Moderate | Based on biceps tendon safety rationale and coaching consensus |
Hot take: Most beginners should not barbell row at all for their first 4–6 weeks. The inverted row builds the same scapular retraction pattern with measurably lower spinal compression, and the time spent building hinge endurance with RDLs pays off in every lift, not just rows.
Your nervous system does not negotiate. When hinge endurance runs out, it finds a new motor pattern. The solution is not more cueing—it is building the endurance floor so the cueing has something stable to work with.
Now that you know why the lower back takes over, here is exactly how to stop it.
The WolfGymCore Beginner Row Protocol: From Inverted Row to Loaded Barbell in 6 Weeks
Build barbell row capacity by progressing through inverted rows, empty-bar technique work, and a double-progression loading model. The rule is simple: add weight only when your torso angle stays fixed across all reps of all sets, with lats fatiguing before lower back.
Download the Barbell Row Setup & Execution Checklist
A one-page PDF with every cue, the Field Test scoring card, and the double-progression tracker—print it, bring it to the gym, know exactly when to add weight.
Enter your email below. No spam. Unsubscribe anytime.
The 6-Week Beginner Row Progression Ladder
This ladder is built on the principle that rowing competence is earned, not assumed. Each phase has a clear exit criterion. Do not move to the next phase until you meet it. More is not better. Better is better.
| Phase | Weeks | Exercise | Sets × Reps | Exit Criterion |
|---|---|---|---|---|
| 1. Foundation | 1–2 | Inverted Row + Romanian Deadlift (light) | 3×10 each | 3×10 inverted rows with controlled tempo, full scapular retraction, zero lower-back fatigue |
| 2. Groove | 3–4 | Empty Barbell Row (20 kg) | 3×8, strict tempo | Field Test score ≥6; torso angle fixed across all reps on video review |
| 3. Load Introduction | 5–6 | Barbell Row (light load) | 3×8 at 25–35 kg | Field Test score ≥6 with load; no lower-back soreness >12 hours post-session |
| 4. Progressive Overload | 7+ | Barbell Row (working weight) | 3×8–10, double progression | Ongoing: add 2.5 kg only when all sets hit 10 reps with fixed torso angle |
Notice the first two weeks do not involve a loaded barbell row at all. That is intentional. The inverted row builds the scapular retraction pattern with the lowest spinal load, and Romanian deadlifts build the hinge endurance that will keep your lower back safe when you eventually pick up the bar.
The Exact Setup: 7 Cues That Fix 90% of Form Errors
These cues are ordered by priority. Run through them in sequence before every set. Once the sequence becomes automatic, you only need to check the ones that tend to drift.
- Feet hip-width, bar over the front third of your foot. Not mid-foot. Slightly closer to the shin gives you a vertical pull path without hitting your knees.
- Double overhand grip, slightly wider than shoulder-width. This grip width keeps your elbows tracking naturally toward your hips. A wider grip shifts emphasis to rear delts; a narrower grip biases the lats. Start with moderate width.
- Hinge until your torso is approximately 45° to the floor. Knees slightly bent, hips high—this is not a squat. Your hamstrings should feel tension, not your quads.
- Chest up, back neutral, neck aligned with your spine. Look at a spot on the floor about 30–45 cm in front of you. Craning your neck up extends the cervical spine and alters the entire spinal alignment.
- 360-degree brace: ribs down, abs tight, glutes engaged. Breathe into your stomach, not your chest. Brace as if someone is about to punch you in the side. Hold it for the entire set.
- Pull by driving your elbows back toward your hips—not your hands up. The hands are hooks. The elbows are the engine. If your biceps burn more than your lats, your elbow path is curling the bar instead of rowing it.
- Lower under control for a 2-second eccentric. Full arm extension at the bottom. Let your shoulder blades reach forward (protraction) at the bottom. Then retract them again on the next pull. No bouncing. No half-repping.
Run through these cues with the empty bar for two full weeks before you add weight. I spent six months rowing with bad form because I was too impatient to spend two weeks on technique. Signal over noise. Always.
For a deeper dive on bracing mechanics, read the WolfGymCore guide on squat bracing for beginners—the same 360-degree brace applies to every compound lift. If your hinge feels unstable, the hip hinge guide for deadlift beginners will clean up your setup before you even touch a row.
The WolfGymCore Decision Engine™: Read Your Body, Choose Your Row
| What You Notice | Likely Training Signal | First Adjustment | What to Avoid | Progress Rule |
|---|---|---|---|---|
| Lower back feels tight during the set | Hinge endurance failing; erectors shifting from stabilizer to mover | Reduce load 10–20% or switch to chest-supported row for this session | Adding more weight or reps to “push through” | Re-test with Field Test in 1 week |
| Torso angle rises 10+ degrees from rep 1 to final rep | Hip extension compensation; load exceeds current hinge capacity | Reset to empty bar; practice 3×10 with fixed angle, or move to inverted rows | Continuing with same load while accepting form drift | Progress only when angle stays fixed across all reps |
| Lats feel nothing; biceps burn | Elbow path too curled; pulling with hands instead of back | Cue “elbows toward hips,” lighten load, add 1-second pause at top | More volume of the same movement pattern | Add reps only when lat engagement is felt on every rep |
| Cannot maintain neutral spine even with empty bar | Hamstring mobility or core bracing deficit | Switch to inverted rows; add daily hamstring mobility and dead bug bracing practice | Forcing the hinge with a rounded back | Re-test barbell row after 2–3 weeks of mobility and bracing work |
| Lower back fine during set, sore for 24+ hours after | Accumulated spinal load exceeding tissue recovery capacity | Reduce total weekly row volume by 1 set; add chest-supported row as substitute | Ignoring the signal and maintaining volume | Increase volume only when post-session soreness resolves within 12 hours |
| Shoulders shrug toward ears at top of rep | Upper trap dominance; scapular retraction not controlled | Cue “shoulder blades back and down,” reduce load, practice band pull-aparts | Heavier weight with shrugging | Add load only when retraction is clean and trap-neutral |
| RED FLAG: Sharp pain, radiating symptoms, or numbness | Possible nerve involvement or tissue injury | Stop immediately; do not self-experiment | Any continuation of the exercise | Seek qualified clinical evaluation before returning to rowing |
| PROGRESS: All reps clean, lats fatigued, lower back neutral | Hinge stability and back recruitment well-matched to current load | Add 2.5 kg or 1–2 reps next session | Changing multiple variables at once | Use double progression: add reps within range, then add load |
Programming Rules: Sets, Reps, Load, and When to Add Weight
Double progression is your default. Start at 3 sets of 8 reps with a weight that keeps your Field Test score at 6 or above. Each session, add one rep per set until you hit 3×10. Once all three sets hit 10 reps with a fixed torso angle, add 2.5 kg and drop back to 3×8. Repeat. This is slow, predictable, and effective. The body adapts to systems, not chaos.
Rest periods: 2–3 minutes between sets. Hinge endurance recovers slower than you think. If you rush rest, you start the next set with a fatigued lower back, and form breaks on rep 2 instead of rep 7.
Frequency: Twice per week, with at least 48 hours between sessions. One session can be barbell rows, the other chest-supported rows or inverted rows for extra volume without additional spinal load. For a complete pull-day structure, check the WolfGymCore barbell technique pillar for exercise sequencing rules.
Case Study: Male, 28, office worker, 3 months of inconsistent gym experience.
Baseline: could deadlift 80 kg for 5 reps with acceptable form. Attempted barbell rows at 50 kg (roughly 60% of deadlift) and experienced lower-back tightness after every session. Had watched multiple form videos but could not identify the error.
Main problem: hinge endurance insufficient for the selected load. Torso rose from ~45° on rep 1 to ~60° by rep 5. Protocol: Weeks 1–2 inverted rows 3×10 + Romanian deadlifts 3×8 (light). Weeks 3–4 empty barbell row 3×8 with side filming.
Weeks 5–6 increased to 30 kg barbell row 3×8 after Field Test score hit 7. Week 7+: double progression from 3×8 at 30 kg. Result: by week 8, performing rows at 42.5 kg without lower-back tightness, with visible lat engagement. Six weeks to pain-free loaded rows, then steady progress.
Wait—actually, that framing is misleading if I leave it at “steady progress.” The reality is that even after the 6-week protocol, some sessions will feel off. Sleep, stress, nutrition, and accumulated fatigue all affect hinge endurance. The Decision Engine exists for those days. Use it. One bad session is data, not a setback.
Even with perfect setup, some days your back will tell you to back off. Here is how to listen without losing progress.
Red Flags, Recovery Rules, and Your Saveable Row Checklist
Discomfort that resolves within 12 hours and does not alter your movement is trainable fatigue. Sharp pain, radiating symptoms, numbness, or soreness lasting more than 48 hours are stop signs. Use the checklist below to audit every row session and catch compensation before it becomes an injury.
Red Flags and When to Seek Professional Help
Stop self-testing and get assessed by a qualified healthcare professional if you experience any of the following during or after barbell rows: sharp, stabbing pain (not muscular burn or fatigue), pain that radiates down one or both legs, numbness or tingling in the legs or feet, loss of bowel or bladder control (this is a medical emergency), pain that worsens over 1–2 weeks despite reducing load, or lower-back discomfort that changes how you walk or stand. These are not “push through” signals. They are “stop and get evaluated” signals.
The 12-month incidence of low back pain in rowers ranges from 32–53% across studies, and lumbar flexion combined with compressive loading is the primary mechanism. The barbell row, when performed with poor hinge control, replicates exactly that mechanism. Respect the signal. Your nervous system does not negotiate.
Recovery, Nutrition, and Training Context
Hinge endurance is not just a gym variable. Sleep deprivation reduces core muscle endurance measurably. A heavy deadlift session 24 hours before rows leaves your erectors with residual fatigue that shows up as early hinge failure. If you program rows the day after deadlifts and consistently see form breakdown, move rows to a different day or accept that the load must be lighter on those sessions.
Practical recovery rules: If lower-back tightness after rows resolves within 12 hours and does not affect your next session, you are within your recovery capacity. If it lingers past 24 hours, reduce volume by one set the following week. If it persists past 48 hours, take a full week off loaded rows, switch to chest-supported or inverted rows, and reassess with the Field Test before returning. Do not ignore the accumulated spinal loading signal—Schäfer et al. (2023) showed that heavy lifting generates forces well beyond typical occupational guidelines, and tissue adaptation requires adequate recovery.
For a broader strategy on managing lifting-related back discomfort, the WolfGymCore lower back pain lifting fixes guide covers the full system.
The Saveable Reference Asset: Your Barbell Row Setup & Execution Checklist
WolfGymCore Barbell Row Setup & Execution Checklist — print this, bring it to the gym, and run through it before and during every row session.
Pre-Lift Setup
- [ ] Feet hip-width, bar over front third of foot
- [ ] Double overhand grip, slightly wider than shoulder-width
- [ ] Hinge at hips until torso is ~45° to floor
- [ ] Knees slightly bent, hips high (not a squat)
- [ ] Chest up, back neutral, neck aligned with spine
- [ ] 360-degree brace: ribs down, abs tight, glutes engaged
Execution (Every Rep)
- [ ] Bar hangs at arm’s length, shoulder blades reach forward (protraction)
- [ ] Pull by driving elbows back toward hips (not hands up)
- [ ] Bar touches lower chest/upper abs
- [ ] Squeeze shoulder blades together at top (retraction), no shrugging
- [ ] Lower under control (2 seconds), arms fully extend at bottom
- [ ] Torso angle stays fixed—no rising, no rounding
Stop Signs (End the Set If)
- [ ] Torso angle changes by more than ~10 degrees
- [ ] Lower back feels work before lats
- [ ] Bar drifts away from body
- [ ] Knees track forward excessively
- [ ] Need to reset brace more than once per set
Post-Set Check
- [ ] Lats and mid-back feel fatigued, not lower back
- [ ] No lumbar tightness or discomfort within 2 hours
- [ ] Form on final rep matched form on first rep
Quick Answers and Frequently Asked Questions
Quick Answers About Barbell Row Form
Why do I only feel barbell rows in my lower back? Your torso angle is drifting upward during the set, shifting the workload from your lats to your erector spinae and hip extensors. Reduce the weight until your angle stays fixed across all reps, and film yourself from the side to confirm.
Should my torso be parallel to the floor during barbell rows? Not necessarily. A 45-degree angle is the practical coaching consensus for beginners—it balances lat recruitment with manageable spinal load. A fully parallel torso increases the lever arm on the lumbar spine and demands significantly more hinge endurance.
Are barbell rows bad for your lower back? Bad form makes them risky. Research shows the standing bent-over row produces the highest lumbar spine load among common rowing variations. But when performed with a stable hinge and appropriate load, the lower back acts as a stabilizer—not a mover—and the exercise becomes safe and effective.
What is better for beginners: Pendlay rows or standard barbell rows? Standard barbell rows with a 45-degree torso angle are generally more forgiving for beginners. Pendlay rows require a fully parallel torso and explosive concentric, which demands more hinge endurance and bracing skill. Earn the standard row first, then experiment.
Why do I only feel barbell rows in my lower back?
Because your hinge angle is not staying fixed. As your erectors fatigue, your torso rises, and the movement shifts from a lat-driven row to a hip-extension-driven pull. Drop the weight, film from the side, and confirm your torso angle stays within ~10 degrees from rep 1 to the final rep. If your lats still do not fire, try chest-supported rows temporarily to isolate the back without the hinge demand.
Should my torso be parallel to the floor during barbell rows?
A fully parallel torso maximizes the lever arm on the lumbar spine and requires advanced hinge endurance. Most beginners do better at approximately 45 degrees, where lat recruitment remains high and spinal load is more manageable. There is no direct comparative study establishing one angle as superior—the 45-degree recommendation comes from coaching consensus and biomechanical rationale. Prioritize torso stability over a specific angle.
Are barbell rows bad for your lower back?
They are not inherently bad. They are demanding. Fenwick et al. (2009) confirmed the standing bent-over row produces the highest lumbar load among rowing variations, which means load selection and hinge stability are non-negotiable. When those are in place, the exercise is one of the most effective lat-builders available. When they are not, the lower back pays the price.
What is better for beginners: Pendlay rows or standard barbell rows?
Standard barbell rows. Pendlay rows require a horizontal torso, a dead-stop between every rep, and an explosive pull—three variables that demand more hinge endurance and bracing proficiency than most beginners have. Start with standard rows at 45 degrees. Once your Field Test score is consistently 8 or above, Pendlay rows become a viable variation. The WolfGymCore warm-up and ramp protocol also applies here—proper warm-up improves hinge mobility and reduces early-set compensation.
That Tuesday morning lesson cost me months of frustration. You have the system now—run the Field Test this week, follow the ladder, and let the checklist be your coach.
Your Next Move
That guy in the empty gym at 6:15 AM—the one whose torso rose like a drawbridge every rep—was me. I fixed it by dropping my ego, dropping the weight, and spending two weeks on inverted rows and empty-bar technique work. The back tightness disappeared within three weeks. The back growth started shortly after. The lesson stuck: the barbell row is not a back exercise. It is a hinge-stability test that happens to train your back. Treat it as such, and it rewards you. Treat it as a weight to be moved at any cost, and your lower back absorbs the cost.
The Wolfgymcore Neural-Mechanical Systems Method™ applies here exactly as it does to every compound lift: Input (load and setup) → Neural Load (hinge endurance demand) → Tissue Stress (lumbar compression + lat tension) → Recovery Signal (soreness pattern) → Adaptation (stronger hinge, bigger back) → Output (more weight on the bar with fixed form). If the chain breaks at any point—usually at the neural load stage when hinge endurance fails—the output is not adaptation. It is compensation.
Start today: Run the Hinge-Stability Field Test with an empty bar or light load. Film yourself from the side. Score yourself honestly. If you score below 6, spend the next two weeks on inverted rows and Romanian deadlifts. If you score 6 or above, begin the double-progression protocol with strict torso-angle monitoring. Read the full barbell technique pillar here for the complete system that ties rows, deadlifts, squats, and bench press into one cohesive programme.
Keep Reading
Hip Hinge for Deadlift Beginners
The same hinge mechanics that protect your back during rows start here. Build this foundation first.
Lower Back Pain Lifting Fixes
If your back tightness extends beyond rowing sessions, this guide covers the full differential.
Bench Press Bar Path for Beginners
Same systems-based approach applied to the bench press. Fix your bar path, fix your press.
About IBN EL KHATYB
Founder of wolfgymcore.com. Writes evidence-informed fitness guides using scientific sources, beginner-friendly training logic, and practical strength programming principles. Also builds AI automation workflows and server systems, then applies the same input-output logic to training content.
Credentials: Performance Systems Specialist | Experience: 2+ years fitness content & biomechanics analysis | Focus: Progressive overload, injury prevention, and systems-based training.
More about the author | Follow on X
Medical Disclaimer: This content is educational and is not a substitute for medical advice, diagnosis, or treatment.
Update Log
- July 2026 — v1.0: Initial publication.
References
- Fenwick CMJ, Brown SHM, McGill SM, 2009 — Comparison of different rowing exercises: trunk muscle activation and lumbar spine motion, load, and stiffness. J Strength Cond Res.
- Edelburg HR, 2017 — Electromyographic analysis of the back muscles during various back exercises. MS Thesis, University of Wisconsin-La Crosse.
- Review of Rowing Injuries, PMC7205948, 2020 — Lumbar spine is the most commonly injured region in rowing, with flexion under compressive loading as the primary mechanism.
- Schäfer R, et al., 2023 — The mechanical loading of the spine in physical activities. Eur Spine J.