

Barbell Technique Fixes for Beginners: 21 Small Cues That Improve Form
Small barbell cues improve beginner form fastest when they are short, external, and tied to visible mistakes like bar drift, knee cave, poor setup, or spinal position loss.
This guide gives you 21 evidence-based micro-fixes organized by lift and phase, plus the WolfGymCore Barbell Technique Field Test and a decision engine that tells you exactly when to add weight, when to hold steady, and when to step back.
If you have been copying generic form videos and still feel unstable under the bar, the problem is not motivation—it is cue overload. Beginners usually do not need more information; they need one clear cue that changes the movement outcome without overloading conscious control. That is what this article delivers: a troubleshooting system, not a generic tip list.

The Problem, Hook, and Field Test
Most beginners fail at barbell lifts not from weakness, but from using too many cues at once.
Small, external-focus cues change movement outcomes without overloading conscious control. Research shows that external-focus cues improved motor performance (Hedges’ g = 0.264), retention (g = 0.583), and transfer (g = 0.584) compared with internal body-part cues.
This means a cue like “push the floor away” works better than “squeeze your quads” because the motor system self-organizes around the outcome, not the anatomy. The result is cleaner bar paths, lower EMG cost, and faster skill retention. When beginners stack five internal cues—chest up, knees out, hips back, core tight, elbows in—their working memory saturates, movement becomes robotic, and form breaks down under fatigue.
The fix is not more cues; it is the right cue, delivered at the right phase, matched to the visible fault.
Why Small Barbell Cues Matter More Than Most Beginners Think
The attentional-focus literature is clear: where you direct your attention changes how your nervous system organizes the movement. Internal focus directs attention to body parts—”extend your hips”—which increases muscular co-contraction and constrains the degrees of freedom the body can use. External focus directs attention to the environment or the object—”drive the bar back toward the rack”—which allows the motor system to find the most efficient solution. For beginners, this difference is magnified because they have not yet automated the movement pattern. Every conscious instruction competes for the same limited attentional resources.
Consider the cause-and-effect chain: when a beginner squats with the internal cue “push my knees out,” the prefrontal cortex processes body-part information, which increases cognitive load, which reduces the bandwidth available for balance and bar control, which produces shaky reps and inconsistent depth. When the same beginner uses the external cue “spread the floor apart,” attention shifts to the interaction between the feet and the ground, the motor system self-corrects knee tracking, and the lifter reports the bar feeling “lighter” because EMG efficiency improved. This is not placebo; it is measurable motor-learning science.
Small barbell cues for new lifters work best when they are short, external, and tied to a visible result. The table below maps common symptoms to the first cue you should try.
| Symptom | Likely Mistake | First Cue to Try |
|---|---|---|
| Knees cave inward | Weak hip abduction or internal focus overload | “Spread the floor apart” |
| Bar drifts forward on squat | Core looseness or excessive forward lean | “Drive your back into the bar” |
| Bench press stalls at chest | Poor leg drive or elbow flare | “Push yourself away from the bar” |
| Lower back rounds on deadlift | Hips too high or setup error | “Bring your hips down and pull the slack out” |
| Shoulder pain on bench | Grip too wide or scapula unpacked | “Tuck shoulder blades down and back” |
Before you start applying cues, you need a repeatable way to score whether your form is stable enough to justify them. That is where the Field Test comes in—but first, understand that hip mobility work and knee pain during squats are separate topics covered in our cluster guides, which you should read if mobility limits your positions.
WolfGymCore Barbell Technique Field Test
A useful beginner self-check should score visible control variables like bar path, stance consistency, knee tracking, and spinal position instead of asking “did that feel good?” The WolfGymCore Barbell Technique Field Test is a 10-point repeatability score with a clear action threshold. Rate each check 0 (fails), 1 (inconsistent), or 2 (stable across all reps).
| Check | What to Look For | Score (0–2) |
|---|---|---|
| Bar Path | Vertical over mid-foot (squat); consistent chest touch (bench); close to shins (deadlift) | ___ |
| Stance / Grip | Identical foot and hand placement set to set within one inch | ___ |
| Knee Tracking | Knees align over toes without valgus collapse | ___ |
| Spinal Position | Neutral spine maintained from start to finish | ___ |
| Tempo Control | No bouncing, grinding, or loss of rhythm | ___ |
| Total Score | / 10 | |
Action thresholds: 8–10 = technique is repeatable; you may progress load cautiously. 5–7 = hold load steady and apply one cue from this guide for two weeks. 0–4 = regress load, simplify the variation, or seek qualified coaching. A form self-check is most useful when it focuses on repeatability, not perfection. The goal is not a flawless rep; it is five reps that look identical. But before you start cueing, you need to know which mechanical variables actually control the bar—and which “rules” you read online are myths.
Science, Anatomy, and What Most Articles Get Wrong
Good barbell form is not one frozen template. It is the version of the lift that keeps the bar controlled and joint demands tolerable for your structure and goal. Squat mechanics change with stance width, foot rotation, trunk position, tibia position, and depth. Bench press joint demands shift with grip width. Deadlift efficiency depends on limb length, hip structure, and starting hip height. This means “perfect form” is a marketing phrase, not a biomechanical reality. The evidence supports safer execution and coaching logic, not a single universal template for every body type.
The Biomechanics That Actually Change Beginner Form
Beginner barbell form mistakes fix best when the reader understands what variable they are changing and why. The table below maps each lift’s primary variables to their mechanical effects and the most common failure pattern.
| Lift Variable | What It Changes | Common Failure Pattern | Best Beginner Cue |
|---|---|---|---|
| Squat stance width | Hip torque, depth, and knee tracking | Too narrow causes valgus; too wide limits depth | “Find the stance where your hips drop deepest without pain” |
| Squat trunk angle | Shear force on lumbar spine and bar path | Excessive forward lean shifts load to low back | “Keep the bar over your mid-foot” |
| Bench grip width | Elbow versus shoulder joint demands | Too wide hurts shoulders; too narrow limits force | “Grip where forearms are vertical at the bottom” |
| Bench elbow tuck | Shoulder impingement risk and press path | Flared elbows increase shoulder stress | “Pull the bar apart as you lower it” |
| Deadlift hip height | Quadriceps versus hamstring/glute contribution | Hips too high turns deadlift into stiff-leg | “Lower your hips until you feel tension in your hamstrings” |
| Deadlift bar proximity | Lumbar shear and lockout efficiency | Bar drifts forward, back rounds | “Drag the bar up your shins” |

The cause-and-effect logic is straightforward: because stance width changes hip torque, a lifter with long femurs and limited ankle mobility will struggle with a narrow stance regardless of how strong they are. Because grip width changes elbow versus shoulder demands, a lifter with anterior shoulder pain may need a slightly narrower grip even if it reduces maximum force output. These are not form errors; they are individualization requirements. Safe barbell training form tips should be specific enough to help but flexible enough to fit real bodies and real goals. If you experience shoulder discomfort during pressing, our guide on rotator cuff health provides targeted prehab work.
What Most Articles Get Wrong About “Perfect Form”
Most fitness content simplifies barbell technique into rigid rules that ignore individual variation. The evidence ladder below separates claims with strong support from those that are context-dependent or weak.
| Evidence Level | Claim | What You Can Safely Say |
|---|---|---|
| Strong (10/10) | External-focus cues outperform internal cues for motor learning | Prefer task-effect cues for beginners |
| Strong (8/10) | Qualified supervision reduces technique-related risk | Beginners benefit from coaching feedback |
| Moderate (7/10) | Fatigue and heavy load contribute to breakdown | Stop sets before mechanics collapse |
| Moderate (7/10) | Grip width changes bench joint demands | Choose grip by goal and tolerance |
| Moderate (6/10) | Squat mechanics depend on stance, trunk, tibia, and depth | Avoid one-size-fits-all stance rules |
| Limited (5/10) | AI posture feedback replaces coaching | Use AI as a supplement only |
| Limited (5/10) | Internal focus is always worse | Internal cues may help hypertrophy in some contexts |
The generic advice table below shows what most articles say, why it is incomplete, and the better evidence-based answer.
| Generic Advice | Why It Is Incomplete | Better Answer |
|---|---|---|
| “Just keep a neutral spine” | Too vague and not phase-specific | Pair setup, load, and fatigue control with the cue |
| “Knees must never pass toes” | Oversimplifies squat mechanics | Joint loading depends on stance, trunk, tibia, and depth |
| “Use internal mind-muscle cues for form” | Weak for motor learning in beginners | External cues generally learn better |
| “One grip width is safest on bench” | Grip changes elbow versus shoulder demand | Pick grip by goal and tolerance |
| “Perfect form prevents injuries” | Injuries are multifactorial | Technique, load, recovery, and supervision all matter |
Once myths are cleared up, the article can move into the actual step-by-step method. Once you understand what actually drives form, the next step is a system of 21 specific cues you can apply today.
Protocol, Decision Engine, and Progression
The 21 cues below are sorted by what you see going wrong, not by anatomy jargon. Each cue is short, phase-specific, and matched to squat, bench press, or deadlift. Real-time correction systems and coach-led studies repeatedly flag similar beginner faults: knee valgus, non-neutral spine, stance mismatch, bar too far, grip too wide or narrow, early knee lock, and excessive arch. The best barbell setup cues beginner lifters can use are the ones matched to the exact fault they are showing. Cues should be short, phase-specific, and attached to the visible problem, not delivered as a long checklist all at once.
The 21 Small Cues by Lift and Setup Phase
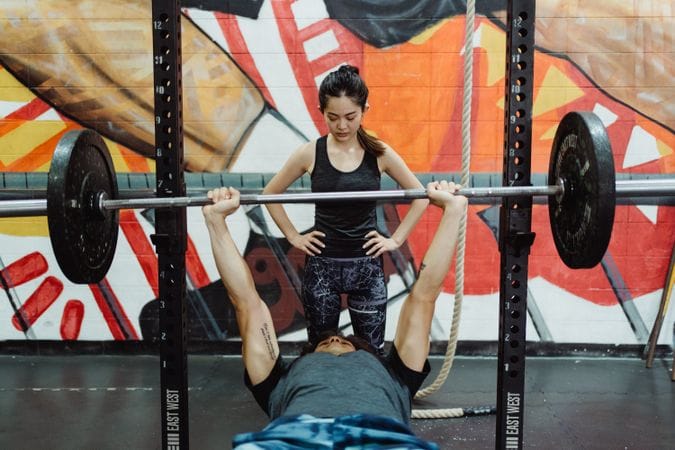
Squat Cues (7 Cues)
Setup Phase
- “Bar on muscle, not bone.” Place the bar on your upper traps or rear delts, not on your neck vertebrae. Because the bar rests on soft tissue, the load distributes across a larger surface area, which reduces cervical pressure and allows you to create a stable shelf with your upper back. If the bar sits too high, the neck extends to compensate, which cascades into thoracic rounding and forward lean.
- “Feet under your armpits, toes out 15 to 30 degrees.” Stance width changes hip torque and depth capacity. Because a stance that is too narrow limits hip clearance, lifters with longer femurs often need a slightly wider position. The toe angle allows the femurs to rotate externally, which creates space for the hips to drop between the knees without impingement.
Descent Phase
- “Spread the floor apart.” This external-focus cue directs attention to the interaction between your feet and the ground. Because the motor system organizes around the outcome of pushing the floor outward, the hips externally rotate automatically, which tracks the knees over the toes and prevents valgus collapse. Studies show distal external focus outperforms proximal external focus (Hedges’ g = 0.224), meaning “spread the floor” works better than “push your knees out.”
- “Sit back and down.” The squat is not a vertical drop; it is a hip hinge combined with knee flexion. Because initiating the movement by breaking at the hips first preserves the bar-over-mid-foot relationship, the lifter avoids excessive forward lean. This cue also prevents the common error of initiating with the knees, which drives them too far forward and shifts torque to the quadriceps.
Bottom Phase
- “Drive your back into the bar.” At the bottom of the squat, torso rigidity determines whether the bar drifts forward. Because bracing against the bar creates an isometric contraction of the entire trunk, the spine maintains its position through the reversal. This is not a cue to hyperextend; it is a cue to maintain the angle you established at the top.
- “Hit depth with control, not collapse.” Bouncing out of the hole uses elastic energy but masks weakness and increases joint stress. Because controlled depth allows the stretch reflex to contribute without losing spinal position, the ascent begins from a stable platform. If you cannot reach depth without rounding, regress to a box squat or increase hip mobility work before adding load.
Finish Phase
- “Push the floor away and stand tall.” The ascent begins with leg drive through the mid-foot, not the toes or heels. Because driving through the whole foot maintains balance, the hips and shoulders rise together. The finish is a full lockout with glutes squeezed, which completes the range of motion and protects the lumbar spine from hyperextension.
Bench Press Cues (7 Cues)
Setup Phase
- “Shoulder blades down and back.” Retracting and depressing the scapulae creates a stable base on the bench and reduces shoulder range of motion. Because a shorter range of motion decreases anterior shoulder stress, this setup cue is the foundation of pain-free pressing. If you cannot maintain this position, review your rotator cuff health and upper-back strength.
- “Grip where your forearms are vertical at the bottom.” Grip width changes elbow versus shoulder demands. Because a wider grip increases shoulder torque and a narrower grip increases elbow torque, the “vertical forearm” rule places the wrist directly over the elbow at the chest, distributing load evenly. This is individual: lifters with longer arms may grip slightly wider, but the forearm angle remains the guide.
Descent Phase
- “Pull the bar apart like a rope.” This external-focus cue creates torque through the shoulders and stabilizes the bar path. Because imagining you are pulling the bar apart engages the lats and keeps the elbows tucked slightly, the bar travels in a slight J-curve toward the lower sternum rather than flaring outward and stressing the shoulders.
- “Touch the bar to your shirt, not your neck.” The touch point should be on the lower sternum or upper abdomen, depending on arm length and arch. Because a higher touch point increases shoulder extension demands, it raises impingement risk. The external cue “touch your shirt” directs attention to the object (the bar) and the target (the shirt), which is easier to process than “tuck your elbows 45 degrees.”
Bottom Phase
- “Pause with your back tight.” A controlled pause at the chest eliminates the stretch reflex and builds starting strength. Because maintaining scapular retraction during the pause prevents the shoulders from protracting, the press begins from the same stable base every rep. Do not relax the back to “rest” the bar on your chest.
Finish Phase
- “Push yourself away from the bar.” Instead of thinking about pressing the bar up, think about pushing your body down into the bench. Because this external-focus cue recruits leg drive and maintains shoulder position, the bar moves in a straight line while the body stays anchored. The lockout should end with elbows extended and shoulders still retracted, not shrugged toward the ears.
- “Drive your feet through the floor.” Leg drive transfers force from the lower body into the upper body via the arch. Because force travels from the floor through the legs, hips, and trunk to the bar, active foot pressure increases total force output. The cue is not to lift your hips off the bench—hips must stay down—but to create tension through the entire kinetic chain.
Deadlift Cues (7 Cues)
Setup Phase
- “Bar over your shoelaces.” When you look down, the bar should bisect your foot at the mid-point. Because the bar over the mid-foot minimizes the moment arm on the lumbar spine, the lifter can maintain a neutral back more easily. If the bar is too far forward, the shoulders fall behind the bar, the hips rise first, and the back rounds.
- “Hinge to the bar, then bring your shins to it.” Many beginners squat down to the bar, which places the hips too low and the shoulders too far behind. Because the deadlift is a hinge, not a squat, the correct sequence is: push hips back, grip the bar, then lower the hips until the shins touch the bar. This sets the lifter in a position where the hips are the engine and the back is the transmission.
- “Pull the slack out.” Before the plates leave the floor, take tension off the bar by engaging tension against the weight. Because this pre-tension removes the jerking motion that often causes spinal position loss, the pull begins smoothly. Think of it as removing the “click” from a seatbelt before you tighten it.
Pull Phase
- “Push the floor away.” The deadlift starts with a push, not a pull. Because the quadriceps extend the knees and the glutes/hamstrings extend the hips, thinking about pushing the floor away recruits the legs first and prevents the back from doing all the work. This external-focus cue produced better performance outcomes in attentional-focus meta-analyses.
- “Keep the bar close—drag it up your legs.” The bar should travel in a vertical line as close to the body as possible. Because a forward bar path increases lumbar shear and makes the lockout harder, the cue to drag the bar up the shins and thighs keeps the center of mass over the base of support. Wear long socks or pants to avoid scraping.
Lockout Phase
- “Squeeze your glutes and stand tall.” The finish is a hip extension, not a back hyperextension. Because the glutes are the primary hip extensors, actively squeezing them at the top completes the movement without leaning back. The shoulders should be back and down, not shrugged.
Lowering Phase
- “Hinge first, then bend the knees.” The eccentric phase should reverse the concentric: hips move back first, the bar clears the knees, then the knees bend to reach the floor. Because bending the knees first forces the bar to travel around them, the load shifts forward and the back rounds. Control the descent; do not drop the bar.
Knowing the cues is only half the battle. You also need clear rules for when to add weight, when to hold steady, and when to step back. For a full program that layers these cues into weekly progression, see our 12-week beginner program.
WolfGymCore Decision Engine™ for Progression and Regression
How to improve barbell form safely depends on whether the problem is skill, load, fatigue, or pain response. Progression should be earned by stable reps across sets, while regression can mean less load, less range of motion, more support, or a simpler teaching sequence. Start from easier to more complex exercises, prioritize demanding lifts early, and use lower percentages with repeated technical practice when skill is unstable.
| Signal | Likely Issue | Best Next Move | Do Not Do This |
|---|---|---|---|
| Bar drifts forward on squat | Core or upper back looseness | Add one torso rigidity cue; hold load | Add weight to “push through” |
| Knees cave inward | Weak hip abductors or poor external focus | Cue “spread the floor”; reduce load slightly | Wrap knees and ignore the fault |
| Bench press stalls at mid-range | Poor leg drive or elbow flare | Cue “push yourself away from bar”; check foot position | Bench more often with same poor form |
| Deadlift rounds at lift-off | Setup too low or hips too high | Reset with hips slightly lower; pull slack out | Yank harder from the floor |
| Pain increases during set | Technique breakdown or overload | Stop set; regress load or variation | Push through pain to finish reps |
| Reps slow down after set 2 | Fatigue-driven form decay | End session for that lift; prioritize recovery | Grind out the remaining sets |
The progression ladder below gives you context for where you are and what comes next. If you are unsure about warm-up sequencing before applying these rules, read our guide on how to warm up for squat, bench, and deadlift. For loading strategies that respect technique, see how to progress compound lifts without breaking form.
| Level | Starting Option | Sets/Reps | Frequency | Progress Trigger | Regression Trigger |
|---|---|---|---|---|---|
| Beginner | Empty bar or very light load, one main cue per set | 2–4 sets of 5–8 | 2–3x/week | Stable technique across all reps | Pain, bar drift, spinal loss, valgus |
| Intermediate | Light-moderate load, cue stacking by phase | 3–4 sets of 4–8 | 2–4x/week | Consistent bar path under moderate fatigue | Fatigue-driven inconsistency |
| Advanced | Specific cueing for performance goal | Context-dependent | 3–5x/week | Goal-specific execution holds under load | Joint irritation or repeated breakdown |
Knowing the cues and progression rules protects you from the most common beginner error: adding weight when you really need more repeatable reps. But there is one more layer—knowing when fatigue and recovery, not cueing, are the real problem.
Recovery, Safety, Saveable Asset, FAQ, and CTA
Recovery and safety boundaries matter because poor form often shows up under fatigue and excessive load, not on rep one. Injury risk is linked to excessive overload, poor technique, short recovery, and fatigue; the most affected areas are commonly the shoulder, lumbar spine, and knees. Know when to adjust training and when to seek help. Safe barbell training form tips include knowing when technique work is enough and when persistent pain or worsening control needs outside assessment.
Recovery, Fatigue, and Red Flags Beginners Should Not Ignore
Beginners generally tolerate resistance training well when qualified instruction, age-appropriate loading, and proper procedures are present. The main risk pattern is not barbell use itself, but the combination of poor technique, excessive load, insufficient recovery, fatigue, and lack of supervision. Because fatigue degrades motor control before strength disappears, the last reps of a set often look worse than the first even when the weight feels manageable.
The cause-and-effect chain is clear: short recovery reduces glycogen replenishment and tissue repair, which increases perceived exertion on the next session, which causes the lifter to compensate with altered mechanics, which shifts stress to non-target tissues, which produces pain or overuse symptoms. This is why recovery quality matters more than any specific supplement claim.
🚨 Red Flags: Stop and Seek Help
- Pain that increases during the training session
- Repeated loss of spinal or joint control across multiple sets
- Inability to complete reps without visible compensations
- Persistent worsening despite lighter loads or technical regressions
- Numbness, tingling, or radiating pain into the limbs
This article is for educational purposes and does not constitute medical advice. If you experience these symptoms, consult a qualified medical professional or licensed physical therapist.
| What Changed? | Try This Training Fix | Seek Help If… |
|---|---|---|
| Form breaks down on later sets | Add 60–90 seconds rest; reduce load 10% | Breakdown happens on set 1 at light loads |
| Shoulder pain during bench | Narrow grip 1 inch; reduce range of motion | Pain persists after 2 weeks of regression |
| Lower back soreness after deadlifts | Lower hips at setup; reduce load 15% | Soreness becomes sharp pain or radiates |
| Knee discomfort during squat | Check stance width; cue “spread the floor” | Swelling, clicking, or pain under bodyweight |
For nutrition support that aids recovery, our protein intake for recovery guide covers evidence-based dosing. If you are struggling with common lifting mistakes that cause plateauing, that cluster article diagnoses programming errors beyond technique.
Saveable Reference Asset and Final Action Plan
Beginners improve faster when they review a small number of faults repeatedly instead of searching for new tips every session. A good barbell form checklist for beginners should tell you what to check before the set, during the rep, and after the set. The saveable asset below combines the 21 cues, the Field Test, and the Decision Engine into one repeatable workflow.
📋 WolfGymCore Barbell Form Checklist (Screenshot This)
Before the Set:
- ☐ Bar position confirmed (traps/rear delts for squat; vertical forearms for bench; mid-foot for deadlift)
- ☐ Stance and grip identical to last session
- ☐ One external cue selected for this set only
- ☐ Bracing technique practiced (360-degree core pressure)
During the Rep:
- ☐ Bar path visible and consistent
- ☐ Knees track over toes (squat/deadlift)
- ☐ Spine remains neutral from start to finish
- ☐ Tempo controlled—no bounce, no grind
After the Set:
- ☐ Field Test score recorded (goal: 8+/10)
- ☐ Video reviewed for one fault only
- ☐ Next set cue decided before resting
- ☐ Load adjustment logged if score dropped below 5
Video feedback, self-observation plus direct instruction, and biofeedback all improved technical learning in novice or recreational lifters, supporting a repeatable review-and-correct workflow. Film your sets from the side for squat and deadlift, and from a 45-degree front angle for bench. Watch one fault per session. If you try to fix five things at once, you fix nothing.
FAQ and Pillar-Link Close
What are the best barbell technique fixes for beginners?
The best barbell technique fixes for beginners are small, external-focus cues tied to visible mistakes. Research from Chua et al. (2021) demonstrates that external-focus cues improve motor performance (Hedges’ g = 0.264), retention (g = 0.583), and transfer (g = 0.584) compared with internal cues. For squat knee valgus, use “spread the floor apart.” For deadlift back rounding, use “bring your hips down and pull the slack out.” For bench press instability, use “pull the bar apart.” These cues work because they direct attention to the movement outcome rather than the body part, which allows the motor system to self-organize more efficiently. The key is using one cue per set, not stacking five cues and hoping one sticks.
Should beginners use internal or external cues to improve barbell form?
Beginners should prioritize external cues for motor learning. The meta-analytic evidence from Chua et al. (2021) and Neumann (2019) consistently shows external focus improves immediate performance, retention, and EMG efficiency. However, context matters. Schoenfeld et al. (2018) found that internal focus increased elbow flexor thickness more than external focus in an 8-week trial, suggesting internal cues may have value for hypertrophy-focused intermediate lifters. For beginners learning the squat, bench press, and deadlift, external cues are the default. Internal cues become a secondary tool once the movement pattern is automated.
How do I know if I should progress or regress a barbell lift?
Use the WolfGymCore Decision Engine. Progress when your Field Test score is 8 or higher, your bar path is consistent across all sets, and you can complete reps without compensation. Hold load steady when your score is 5–7 and apply one cue for two weeks. Regress when your score drops below 5, pain appears, or control falls apart. Regression options include reducing load by 10–15%, shortening range of motion (box squat, floor press, block pull), increasing rest periods, or switching to a simpler variation. Faigenbaum & Myer (2009) emphasize that qualified supervision and progressive load management are recurring safety themes across the injury-prevention literature. Do not add weight to push through form breakdown.
When should I stop trying to fix my form on my own?
Stop self-correcting and seek qualified help when pain increases during training, you experience repeated loss of spinal or joint control, you cannot complete reps without compensations, or symptoms worsen despite lighter loads and technical regressions. These are red flags that indicate a problem beyond cueing. Bengtsson et al. (2018) note that technique faults are not isolated from fatigue and overload, and Bonilla et al. (2022) identify poor technique combined with excessive load as a primary injury pattern. A licensed physical therapist or qualified strength coach can assess whether the issue is mobility, motor control, tissue capacity, or programming. This article provides a framework; it does not replace individualized assessment.
Your Next 2 Weeks: A Practical Action Plan
Week 1: Film one lift per session. Apply one external cue per set. Score yourself with the Field Test. Do not add load unless you score 8+.
Week 2: Keep the cue that produced the most visible improvement. Add a second cue only if the first is automatic. Review your video for the same fault, not a new one.
After 2 weeks: Re-test your working weight. If reps look cleaner at the same load, you have earned a small progression.
Ready for the full system? Read our complete beginner strength training guide to integrate these cues into a full program.
Related Guides
Expand your training knowledge with these WolfGymCore cluster articles:
- Knee Pain During Squats: 7 Fixes for Pain-Free Reps
- Best Hip Mobility Exercises for Deeper Squats: 7 Pro Drills
- 9 Best Rotator Cuff Exercises for Pain-Free Pressing
- Weightlifting Program for Beginners: The 12-Week System
- The 2026 Protein Powder for Muscle Gain Protocol
- Common Lifting Mistakes That Cause Plateauing
- How to Build Strength at Home: The Systems Protocol
References
Chua, L.-K., Jiménez-Díaz, J., Lewthwaite, R., Kim, T., & Wulf, G. (2021). Superiority of external attentional focus for motor performance and learning: Systematic reviews and meta-analyses. Psychological Bulletin, 147(6), 618–645.
Straub, R., & Powers, C. M. (2024). A Biomechanical Review of the Squat Exercise: Implications for Clinical Practice. International Journal of Sports Physical Therapy, 19, 490–501.
Mausehund, L., Werkhausen, A., Bartsch, J., & Krosshaug, T. (2021). Understanding Bench Press Biomechanics—The Necessity of Measuring Lateral Barbell Forces. Journal of Strength and Conditioning Research, 36, 2685–2695.
Faigenbaum, A., & Myer, G. (2009). Resistance training among young athletes: safety, efficacy and injury prevention effects. British Journal of Sports Medicine, 44, 56–63.
Bengtsson, V., Berglund, L., & Aasa, U. (2018). Narrative review of injuries in powerlifting with special reference to their association to the squat, bench press and deadlift. BMJ Open Sport — Exercise Medicine, 4.
Bonilla, D., Cardozo, L., Vélez-Gutiérrez, J. M., Arévalo-Rodríguez, A., Vargas-Molina, S., Stout, J. R., Kreider, R., & Petro, J. (2022). Exercise Selection and Common Injuries in Fitness Centers: A Systematic Integrative Review and Practical Recommendations. International Journal of Environmental Research and Public Health, 19.
Neumann, D. (2019). A Systematic Review of Attentional Focus Strategies in Weightlifting. Frontiers in Sports and Active Living, 1.
Nicklas, A., Rein, R., Noël, B., & Klatt, S. (2022). A meta-analysis on immediate effects of attentional focus on motor tasks performance. International Review of Sport and Exercise Psychology, 17, 668–703.
Schoenfeld, B., Vigotsky, A., Contreras, B., Golden, S., Alto, A., Larson, R., Winkelman, N., & Paoli, A. (2018). Differential effects of attentional focus strategies during long-term resistance training. European Journal of Sport Science, 18, 705–712.
Mehta, N., Henderson, S., & Spetan, H. (2026). Integrated Biomechanical Framework for the Barbell Back Squat: A 26-Parameter Model for Technique Standardization and Injury Risk Reduction. Journal of Movement Mechanics & Biomechanics Science.
Nikhil, V., & Bari, M. A. (2025). Real Time Powerlifting Form Assessment using Yolov5 and Mediapipe. International Journal of Information Technology and Computer Engineering.
Rao, P., Asha, C. S., & Rao, P. (2025). Real-Time Posture Correction of Squat Exercise: A Deep Learning Approach for Performance Analysis and Error Correction. IEEE Access, 13, 39557–39571.
Grgic, J., Mikulić, I., & Mikulic, P. (2021). Acute and Long-Term Effects of Attentional Focus Strategies on Muscular Strength: A Meta-Analysis. Sports, 9.
Król, H., & Gołaś, A. (2017). Effect of Barbell Weight on the Structure of the Flat Bench Press. Journal of Strength and Conditioning Research, 31, 1321–1337.
Da Silva, M. V. G., De Noronha, B. C., De Souza, A. J. C., Caffaro, J. L. R., Cedeçari, M. E. L., & Santos, M. (2025). Incidence of Injuries in Resistance Training: Risk Factors and Most Affected Body Areas. International Journal of Health Science.
Kawa, O., Żywiec, W., Czyżewski, B., Kozłowski, K., Dorota, A., Dorota, M., Milczarek, C., Koval, I., Mariankowska, A., & Czyżewska, J. (2025). Most Common Injuries in Resistance Training: Mechanisms, Therapeutic Interventions, and Preventive Strategies. Cureus, 17.
Alqarni, A. (2019). Common injuries in resistance training. Saudi Journal of Sports Medicine, 19, 38–42.
Zwolski, C. M., Quatman-Yates, C., & Paterno, M. (2017). Resistance Training in Youth: Laying the Foundation for Injury Prevention and Physical Literacy. Sports Health, 9, 436–443.
Souissi, M., Trabelsi, O., Souissi, H., Elghoul, Y., Ammar, A., Chamari, K., & Souissi, N. (2021). The video feedback viewing in novice weightlifters: Total control strategy improves snatch technique during learning. International Journal of Sports Science & Coaching, 17, 1408–1417.
Lorenzoni, V., Staley, J., Marchant, T., Onderdijk, K. E., Maes, P.-J., & Leman, M. (2019). The sonic instructor: A music-based biofeedback system for improving weightlifting technique. PLoS ONE, 14.
Finlay, M., Marchant, D., Langley, C., & Simpson, T. (2025). Impact of attentional focus and action verbs on bench press performance. Human Movement Science, 102, 103385.
Wulf, G. (2013). Attentional focus and motor learning: a review of 15 years. International Review of Sport and Exercise Psychology, 6, 104–77.
Werner, I., & Federolf, P. A. (2023). Focus of Attention in Coach Instructions for Technique Training in Sports: A Scrutinized Review of Review Studies. Journal of Functional Morphology and Kinesiology, 8.